Rank Math SEO Setup and Settings

Rank Math SEO setup I have prepared a comprehensive guide on Also the best RankMath SEO settings You will have a complete installation with it. Rank Math is a free SEO plugin available to WordPress users.
WordPress SEO plugin It is one of the free and comprehensive plugins that come to mind when it comes to I'm on my site too Rank Math I use the SEO plugin and recommend it to my visitors. Yoast SEO It is a much better and simpler plugin than the plugin.
Let's move on to the installation stages of this comprehensive plugin.
Text Contents
Rank Math SEO Setup
# STEP 1: First of all, your wordpress site your siteadmin.com/wp-admin Login to the admin panel.
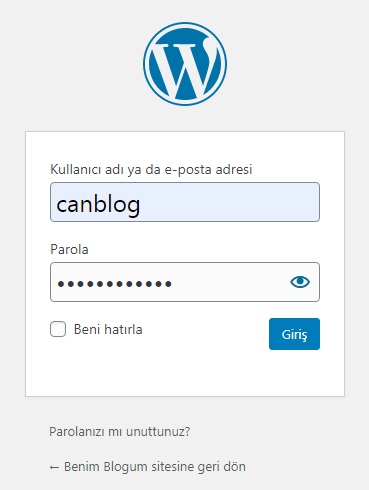
# STEP 2: After logging into the admin panel, on the left Plugins >> Add New follow your path.
# STEP 3: Then, after you type Rank Math in the search section on the right, you will see the Rank Math plugin in the results. located on Install Now click and then Activates Click the button.
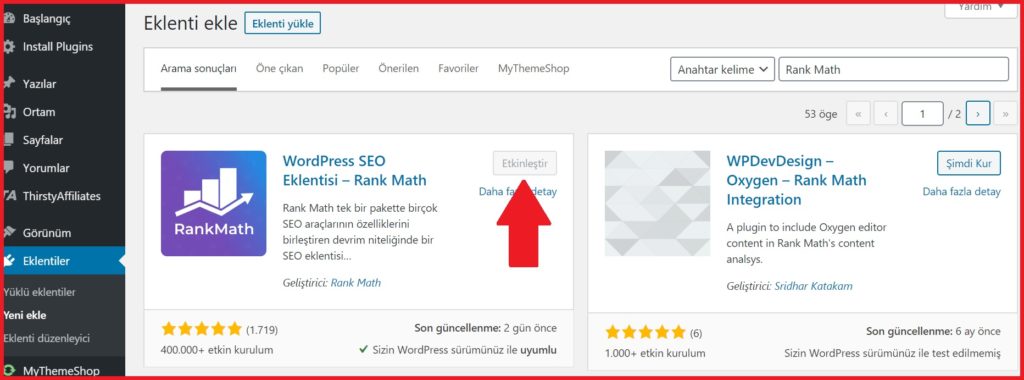
Rank Math SEO setup is complete. The installation process is that simple. Now let's make the important Rank Math SEO settings.
Rank Math SEO Settings
# STEP 1: After installing the add-on, the installation wizard will appear. The setup wizard will ask you to link your account. If you want to connect the Rank Math plugin with your Gmail account Link Your Account Click the button, if you don't want it, click the button below. Skip Now Click the button.
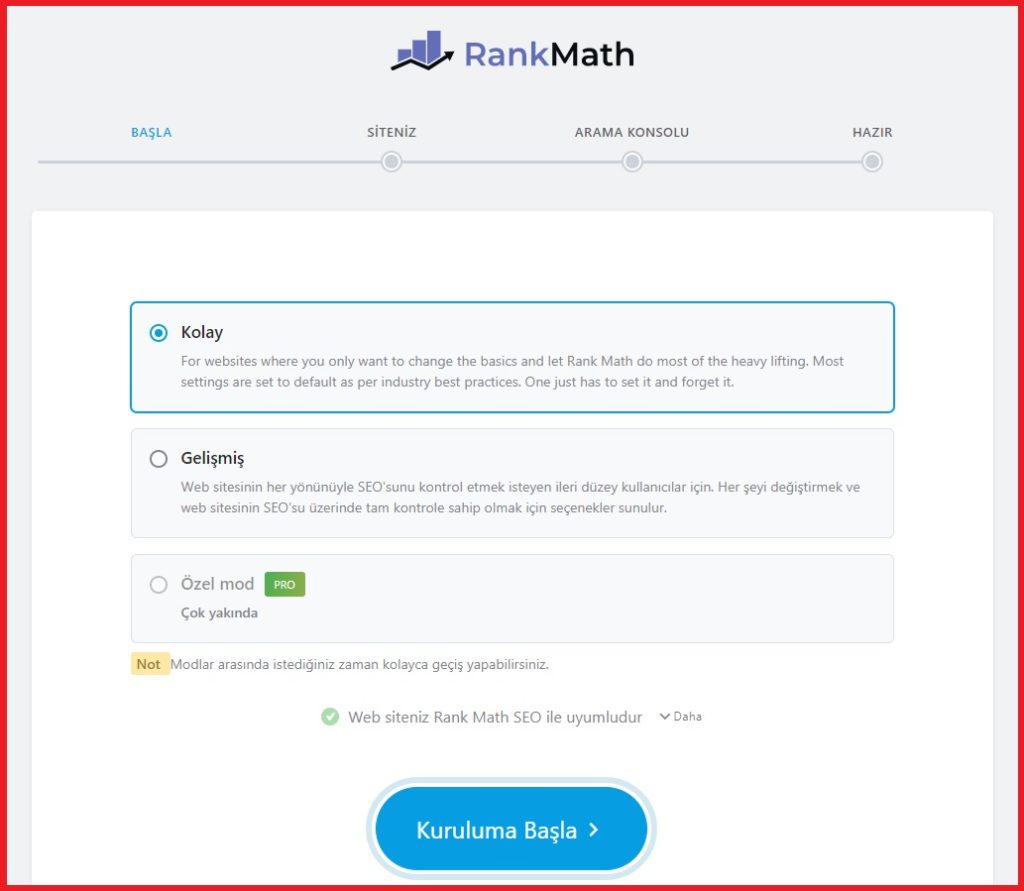
# STEP 2: The installation wizard of the add-on will open. Here it gives you 3 options. If you want to trade professionally Advanced Setup, if you want a simple installation Simple Installation you can choose.
First of all, I prefer the simple installation and click the Start Installation button.
# STEP 3: A page will come up asking you to choose your blog type, logo and social sharing image. Fill in the relevant fields save and continue Click the button.
# STEP 4: The page where you will create the link of your site with the Google search console has come to you. located here Get Confirmation Code Click the button and go to the next step.
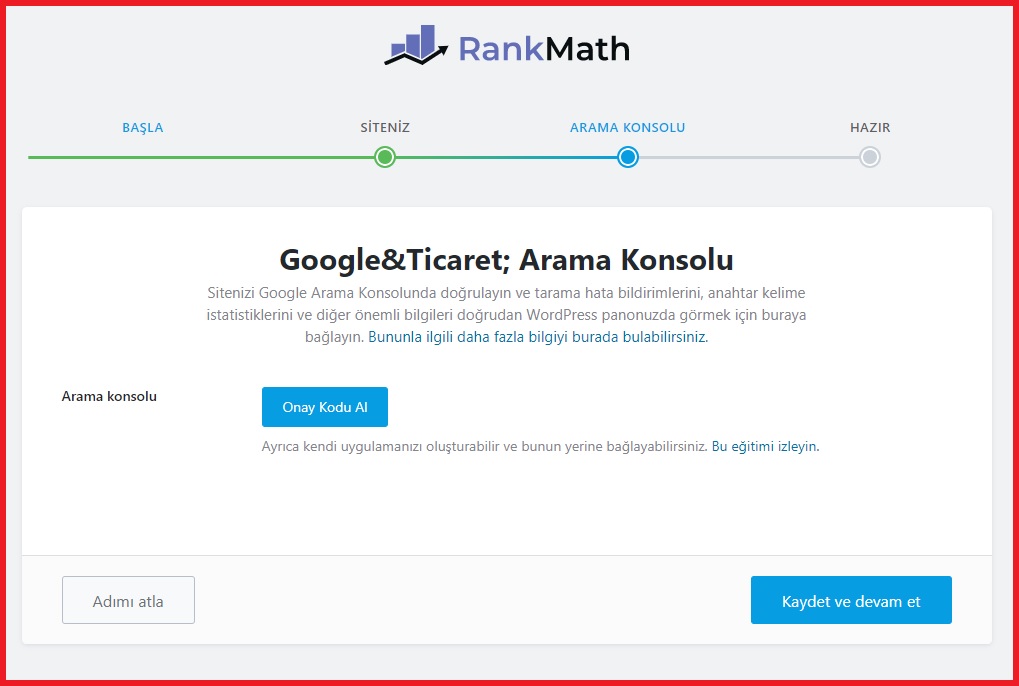
# STEP 5: A small window will open in front of you and ask you to select your gmail account to which you want to connect your site. Select the account and in the other field that opens Allow Click the button.
# STEP 6: After giving permission, copy the code that appears.
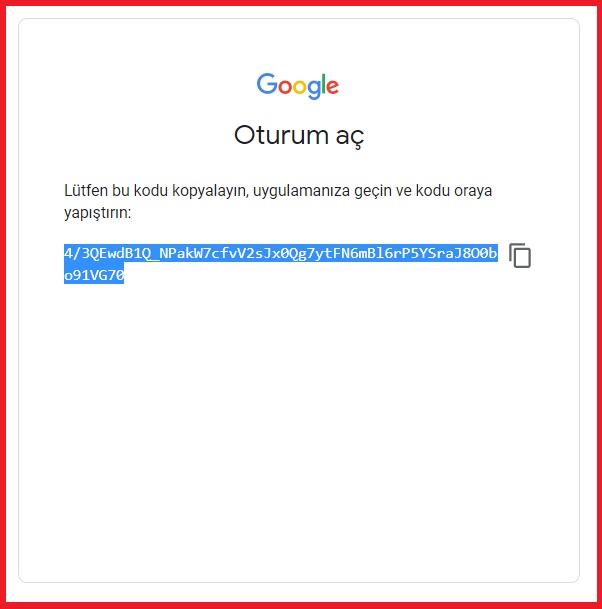
# STEP 7: Paste the code on another page with "Save and Continue" Click the button.
# STEP 8: Complete the installation of the wizard by clicking Return to control panel.
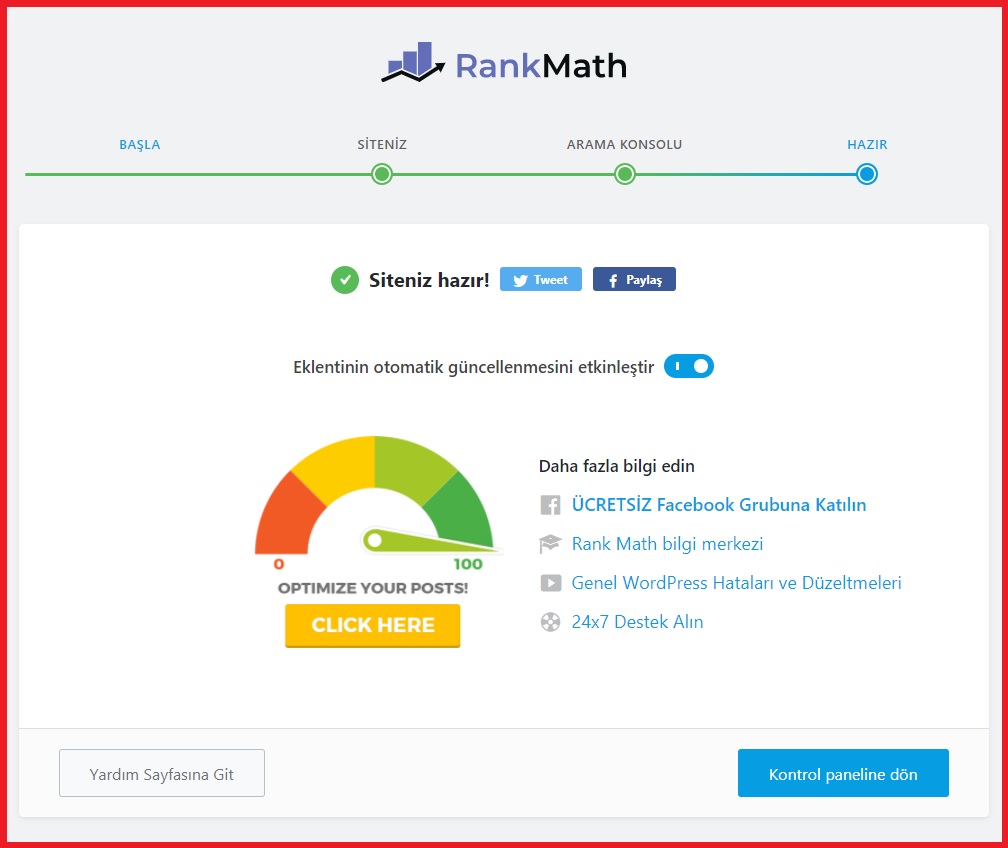
# STEP 9: We're done with the setup wizard. A panel like the one below will open. There isn't much you need to edit here. You can turn on these options if you are only using AMP and WooCommerce.
# STEP 10: From the menu on the left General Settings Click on.
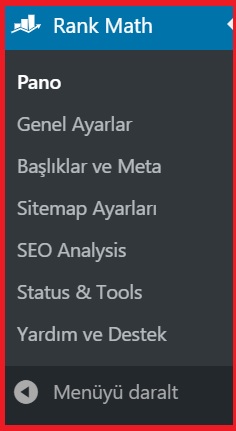
1. Rank Math SEO General Settings Section
The general section contains many settings sections. You can apply the most stable settings here one by one as I explained below.
Links
- Strip Category Base / Open
- Redirect attachments / Open
- Redirect Orphan Attachments / write your site address
- Nofollow External Links / Open
- Nofollow image file links / Open
- Open External Links in New Tab / Window / Open
Navigation Bar
- Enable bookmark paths function / Open
- Show Homepage Link / Open
- to the Homepage label section Home in summer.
- Archive Format section %s Archives in summer.
- Search Results Format section %s Results in summer.
- 404 label section 404 Error: page not found in summer.
- Show Category(s) / Open
Webmaster Tools
From this section, you can establish a link between your site and other search engines.
MISCELLANEOUS
You can turn on the Show SEO score setting in this section as you wish, I use it off.
Add the following to the RSS Before Content section.
%BLOGLINK%
%POSTLINK%
%FEATUREDIMAGE%
Add the following to the RSS After Content section.
Bu yazı %POSTLINK% ilk olarak %BLOGLINK% yayınlanmıştır.That's all we're going to do about the general settings part.
2. Titles and Meta Settings
I share with you the settings I use to make the best of the titles and meta settings. You can apply all the settings below with peace of mind.
Global Meta
You can leave the settings in this section as they are. There is no important part that needs to be changed.
Local SEO
The settings in this section are related to whether you are a Person or an Organization. If you are a corporate company, you must select the establishment area. Here it asks you to enter your name, logo and link of your site. Fill in the relevant fields.
Social Meta
In this section, you can enter the names of your facebook and twitter social media accounts. You won't lose anything if you don't enter, but I recommend you to enter.
Home
home page title Paste the code below.
%sitename%Home meta description In the section, enter a short text with your keywords about what your site is about.
Authors
You can enable this if your Author Archives site has multiple authors. If there is only one author, you do not need to enable it.
If you have enabled, make the following settings, if not, go to the next step.
Author Base to the part author in summer.
Author Robot Metas / Closed
Place the following code in the Author Archive Title.
%name% %sep% %sitename% %page%Place the following code in the Author Archive Description section.
%user_description%Add SEO Meta Box for Users / Open
Move Pages
History Archives / Out of order
404 Header place the code below.
Sayfa Bulunamadı %sep% %sitename%Search Results Title place the code below.
%search_query% %page% %sep% %sitename%Noindex Search Results / Open
Noindex Paginated Pages / Open
Noindex Archive Sub-Pages / Open
Not indexing password-protected pages / Open
Articles
Place the following code in the Single Post Title section.
%title% %sep% %sitename%Leave the Single Text Comment section as it is.
Schema Type / Article (you can choose this part according to yourself)
Leave this part of the cuff as it is.
Comment Leave this part as is.
Type of article / I am using it as an article, choose according to yourself.
Text Robots Meta / Closed
Connection Suggestions / Open
Link Suggestion Titles / Open
Primary taxonomy / Categories
Add SEO Meta Box / Open
Batch Edit / Effective
Pages
Leave the Single Page Title as is.
Leave the Single Page Description as is.
Leave the other fields as they are.
Categories
In this part, all you have to do is Category Archives Robots Meta by opening the Category Archives Robots Meta from the part No Directory select option.
Add SEO Meta Box also select off.
Tags
Apply the same settings in the Categories section here as well. These settings will prevent categories and tags from being indexed in the Google index. This is the most stable setting for WordPress SEO.
3. Sitemap Settings
In the sitemap settings section, only the category and tag sections Include in Sitemap Make sure the partition is closed.
Quick Indexing Settings on Google
As you know, after publishing an article, we provide indexing by making a fetch like Google over Search Console. With this method, we connect our site to Search Console via api and automatically call Google bots for every content we publish/edit.
Step-1
Install the Google Indexing API plugin. You can download it by clicking here.
Step-2
Google API ConsoleGo to and create a new project.
Admit it ve Go on After saying that, you will have created your project.
Step-4
To create a service account, click on the hamburger menu in the upper left and service accounts switch to tab.
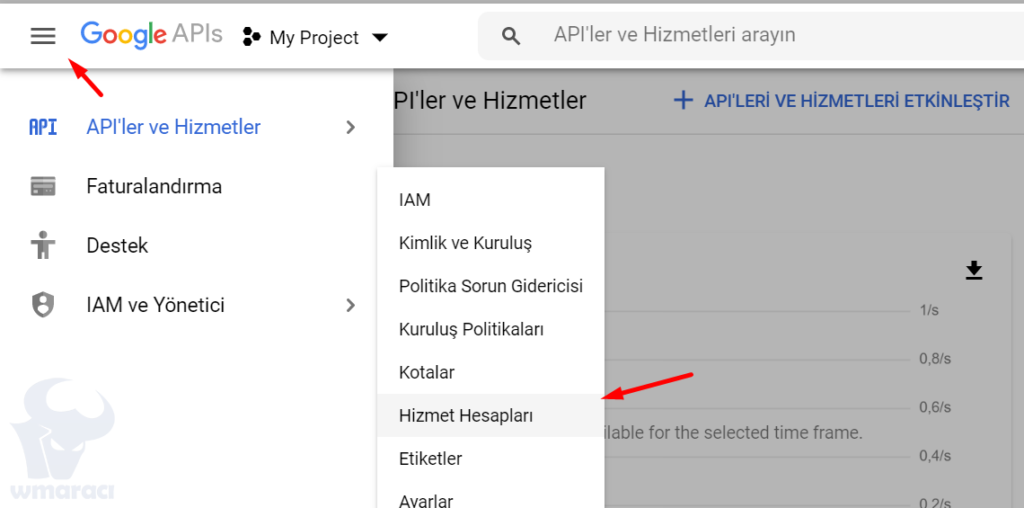
At the top of the screen that appears Create Service Account Click on.
Fill in the fields in the window that opens. You can leave the description field blank.
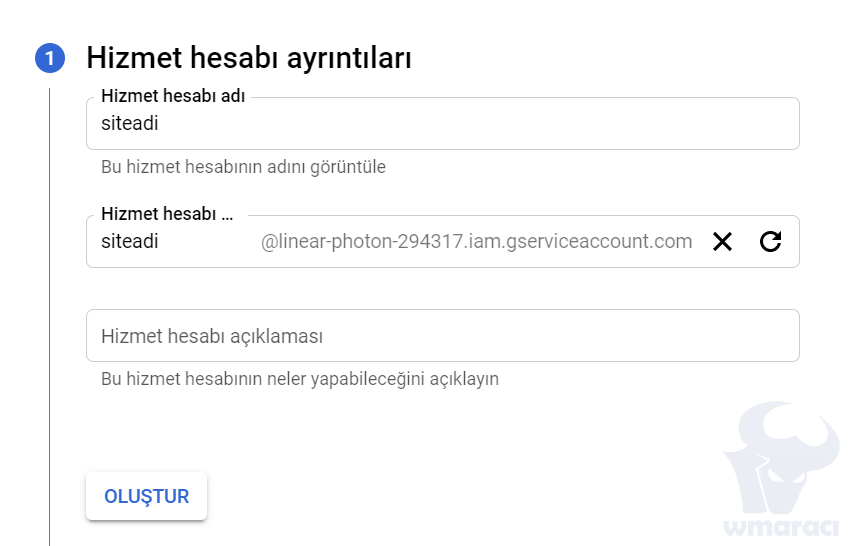
It will ask you to add a role to the API you created. It is very important that you choose as the owner.
Done Click the button to end the process. An e-mail address will be created in the field that will appear, make sure to write it down, it will be useful for us soon.
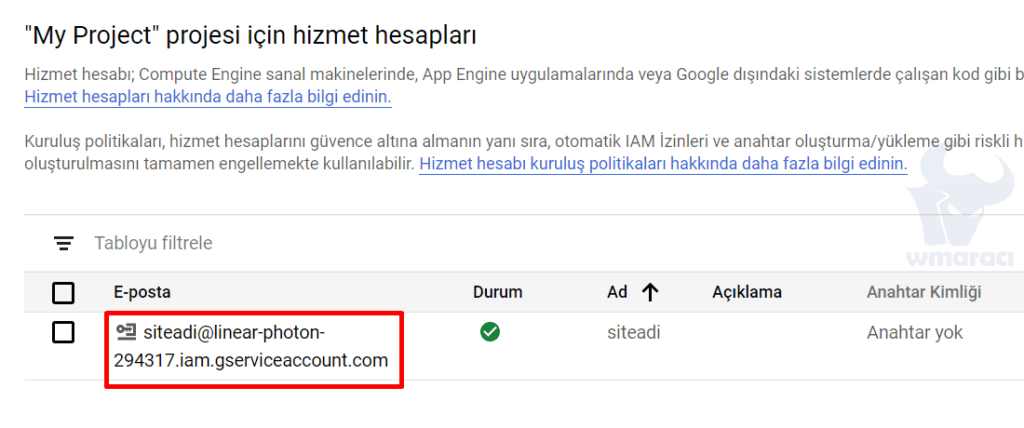
Step-5
We came to create the key code that we will connect to our site. On the screen we come to, we press the 3 dots under the operations text on the right and generate key we say. Two options will appear before us. JSON We select it and click create.
A .json file will automatically download to your computer. We're keeping it, it'll come in handy soon.
Step-6
We need to associate your service account with Google Search Console. I know it's long and tiring, but your patience is short.
With the e-mail address we registered on our site Google Search ConsoleWe enter .
From the menu on the left Settings We click on the kick, on the page that opens before us Users and permissions we click.
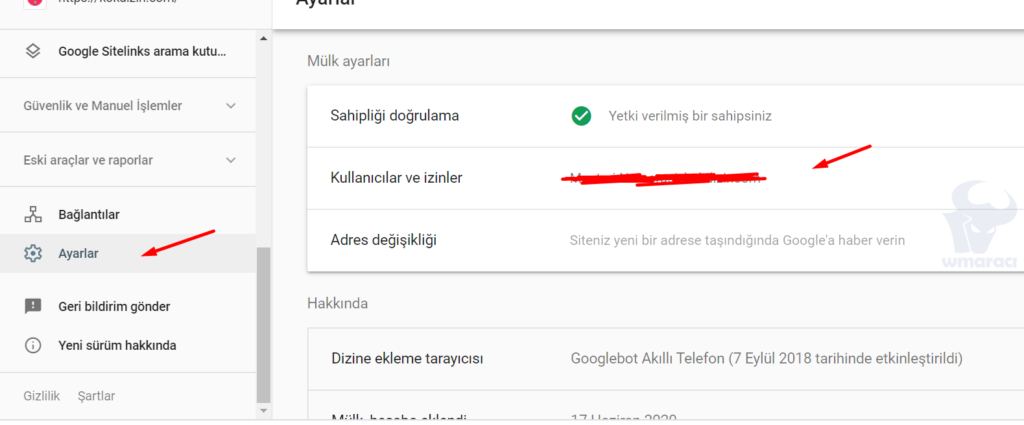
On the screen that opens, we click on the 3 dots next to the e-mail address with full authorization. Manage property owners Click on step.
In the newly opened window, we go down to the bottom and Add owner we click the button. We write the e-mail address we created in step-4 here. continuation We hit the button and congratulations! You have now linked Google Search Console with your Google Service API.
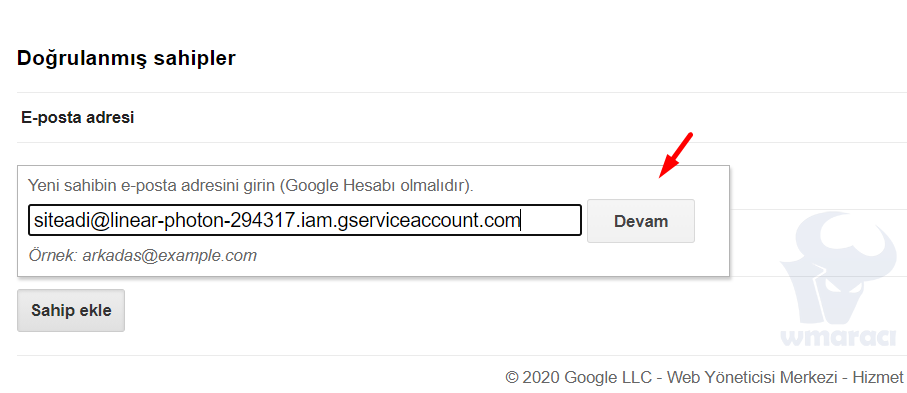
Step-7
We enter the admin panel of our WordPress site, install and activate the Google Indexing API plugin that we have given in Step-2. From the menu on the left Rank Math Click on the section and instant indexing Switch to tab.
On this page just click Or upload JSON file in the Select file we click the button. We upload the .json file that we downloaded in step-5 here and save changes we press the button. If the upload is not successful, open your .json file with notepad, copy all the contents and paste it into the textbox. save changes You can press it.
Step-8
Rank Math in the section instant indexing We re-enter (refresh) the page. If you did everything right, you will see a screen like this.
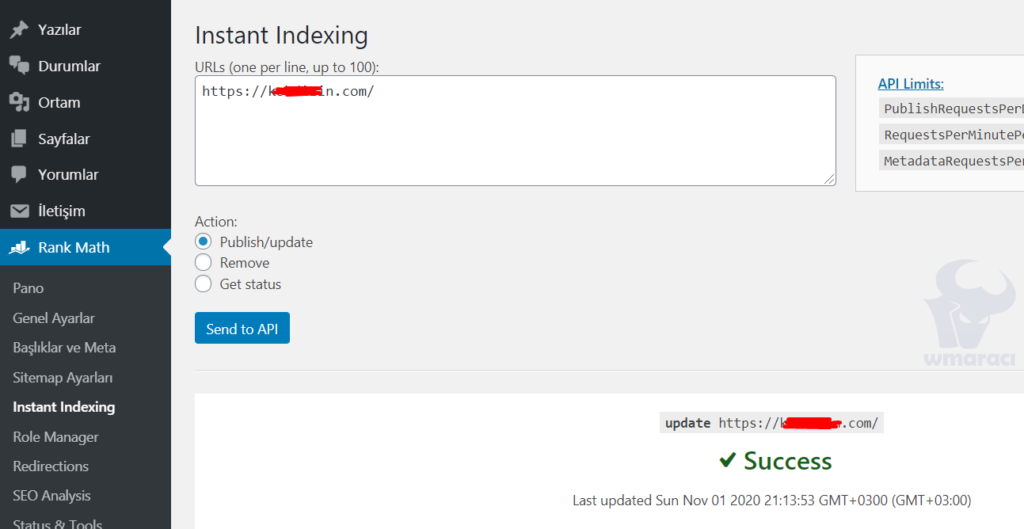
Before & publish/update select the part Send to API we press the button. Success after seeing get statusWe select and again Send to API we press the button. Still Success If you have seen the text, congratulations, your automatic indexing plugin is ready. You don't need to do anything else, when you enter or edit an article, the plugin will automatically fetch like Google and call the bots to your site.
Even if you do every step right Success If you can't see the text and get an error, the API may not be enabled.
Click here go to the link. Enable If you do, the problem will be solved.
I explained in detail, down to the smallest detail.
Conclusion
Making the Rank Math SEO settings properly is important for the future of your site. I disable tag, category, date archive and author archives on every site. When you leave it open, sometimes the categories can rank above the articles you write.
# Related Content: WordPress Site Speed Up Techniques (10 Effective Methods)
You can specify your questions and problems about Rank Math in the comment field below.